
Table of Contents
- How Can You Tell If Silver Is Real or Silver-Plated?
- What’s the Best Silver Polish?
- What Cloth Should You Use to Polish Silver?
- How to Clean Tarnished Silver, Step by Step
- How to Clean Silver Without Polish: The Baking Soda Method
- How to Store Silver So It Doesn’t Tarnish
- Bring Your Silver Back to Life
- FAQs
The holidays are coming, and that means it’s time to dig out the good serving pieces. For many of us, that means a trip to the storage unit to find the silver platter for the Thanksgiving turkey, the punch bowl for the holiday party, or Grandma’s flatware for the big family dinner.
That’s exactly how I ended up polishing silver this season: a full tea and coffee service, four candlesticks, and a candy dish. The catch? After months (or years) tucked away, silver rarely comes out looking festive. Mine was dull, gray, and black with tarnish in spots, and parts of it had a copper-colored film. (That coppery tint is common, since tarnish often starts out yellowish or bronze before it darkens.) Thankfully, my great-grandmother's silverware set was still sparkling due to the last polishing I did.
The good news is that tarnish is almost always fixable. With the right polish, a couple of good cloths, and a little patience, your silver can be gleaming in time for your first holiday gathering. Here’s what I’ve learned about cleaning tarnished silver, which silver polish works best, and how to store silver so it doesn’t tarnish before next year.
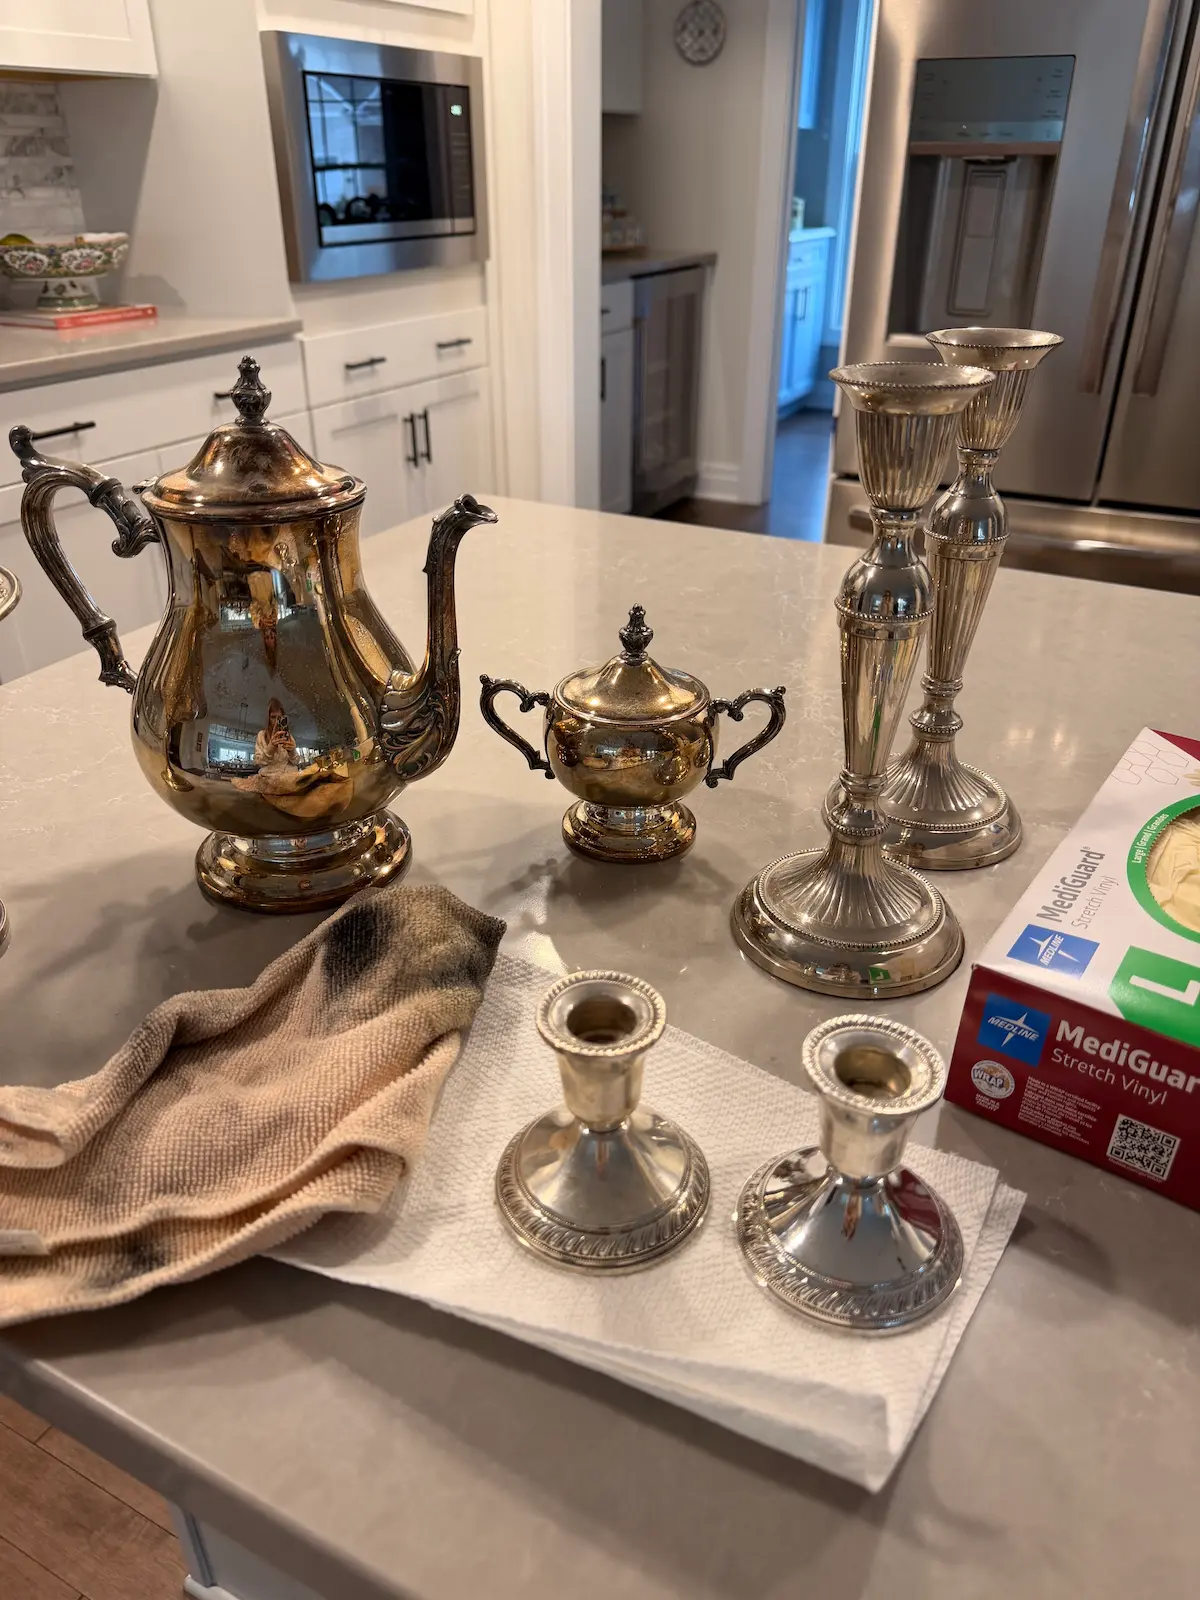 Some of the silver pieces I polished. You can see the difference between the two weighted candle holders. The one on the right? Shiny and bright!
How Can You Tell If Silver Is Real or Silver-Plated?
The quickest way to tell if silver is real is to look for a stamp. Before you grab the polish, take a minute to check whether you have sterling silver or silver plate, and what condition it’s in.
Check for markings. Flip the piece over and look for a stamp. “Sterling” or “925” means solid sterling silver. Marks like “EP,” “EPNS,” or “silver plate” mean a thin layer of silver over another metal. If you’re cleaning silver plate, use a gentler touch, because heavy scrubbing can wear right through to the metal underneath.
Look at the condition. Note any dents, loose handles, or wooden and bone parts. Those details matter when you clean, since you don’t want to soak or over-polish them.
Consider the value. If a piece looks especially old, ornate, or carries a maker’s mark you don’t recognize, it may be worth having it appraised before you clean it. Some collectors prefer antique silver with its natural patina intact.
What’s the Best Silver Polish?
My top picks. The best silver polish is one that removes tarnish without scratching, so I tried a few to see which did it best. Three stood out. The first is Weiman Silver Polish and Cleaner. It’s very cost-effective, and in the end it did the best job of making my silver look bright and shiny, even on pieces with heavy tarnish.
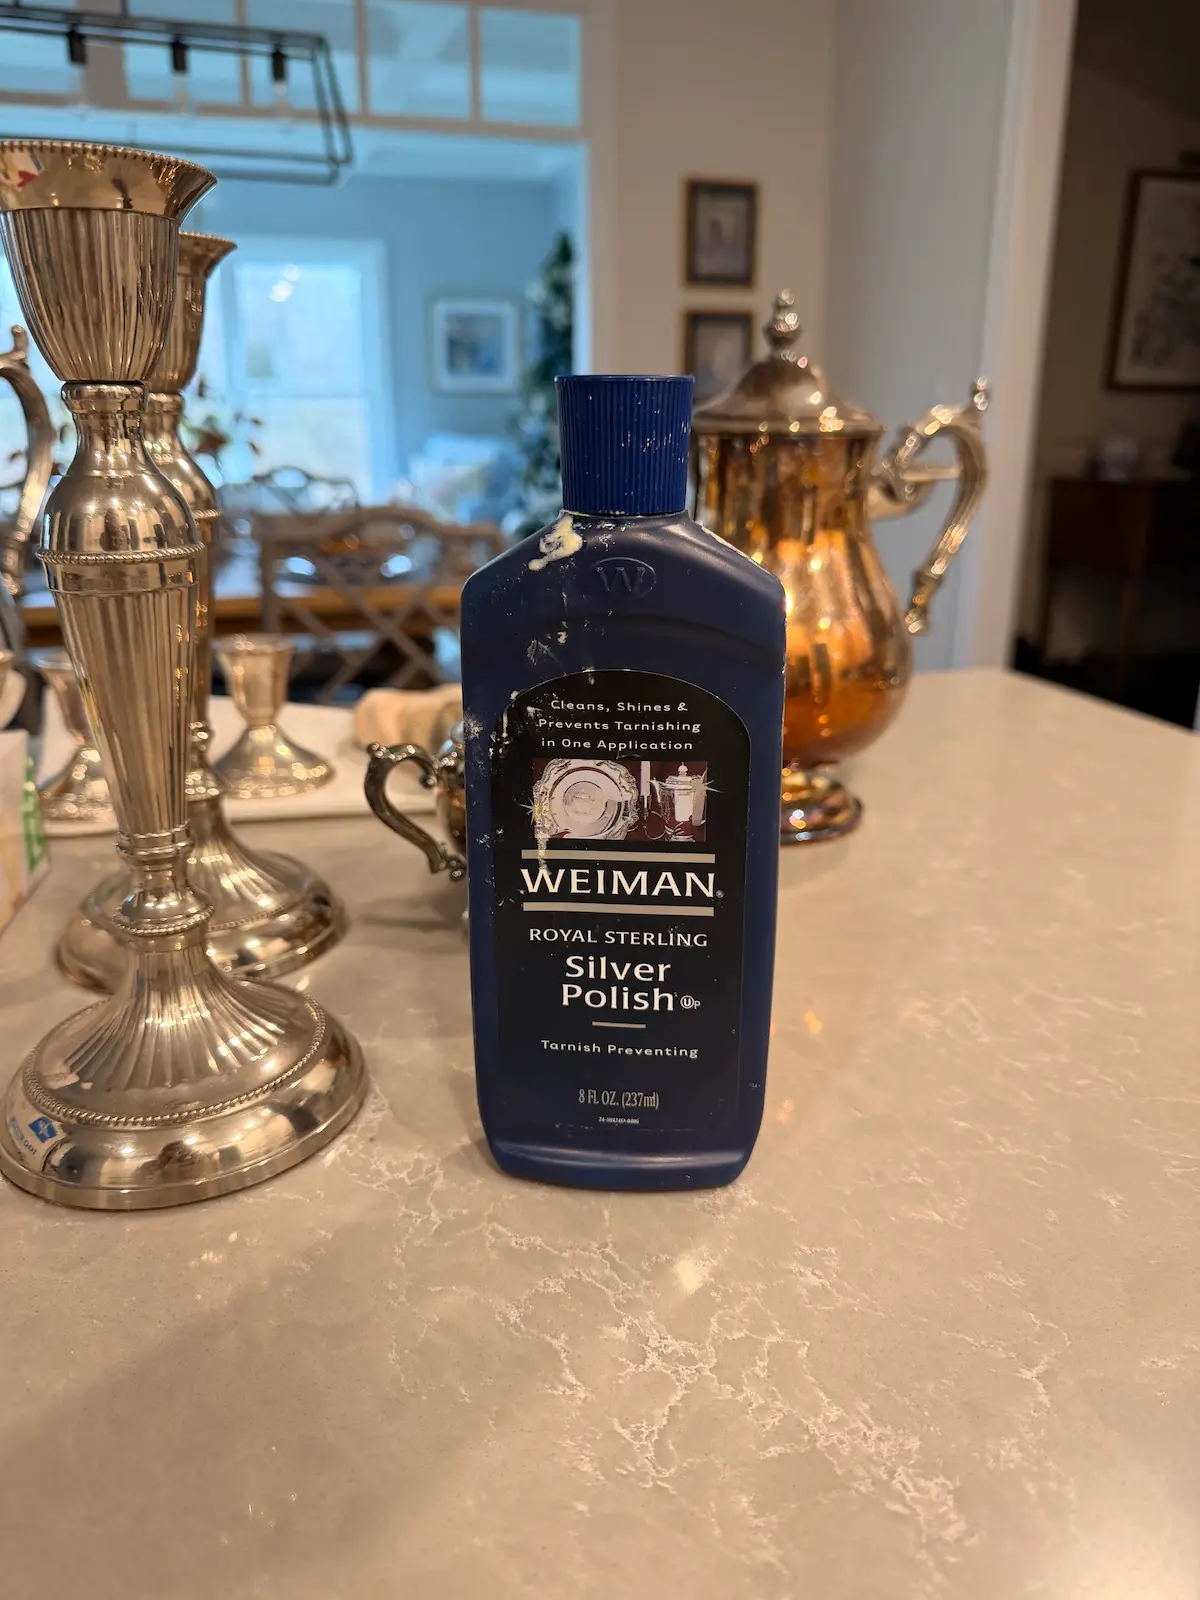
That said, it isn’t perfect. It’s a very thin, runny liquid, so it gets everywhere if you’re not careful. If you use too much, it can clump up and make a mess. And honestly, the smell is pretty bad. I still think the results are worth it, but go in prepared: work in a well-ventilated spot and use less than you think you need.
The second is Goddard’s Silver Polish Foam, which I really liked. It comes with its own little sponge applicator: you dampen the sponge with warm water, work up a lather, and polish. It worked well, and it has a really pleasant, almost perfume-like scent, which was a welcome change.
But it didn’t foam up the way I expected, even after wetting the sponge with warm water, and my jar arrived leaking in the shipping box. If you order it online, open the package over a sink or towel, just in case.
The third is Wright’s Silver Cream, made by Weiman. The version I bought came bundled with a polishing cloth and had a little sponge tucked inside the jar, which I used to apply it. I thought it was every bit as good as the Goddard’s foam. It has a pleasant smell, too, just not as noticeable.
One thing to know about both the Goddard’s foam and the Wright’s cream: I had to really buff afterward with a cloth to get the full shine. Plan on a little extra elbow grease at the end.
| Polish | Price | What you get |
|---|---|---|
| Weiman Silver Polish and Cleaner | $9.99 on Amazon | Just the cleaner. I purchased mine a while back and it was sitting in storage, so I likely paid less. |
| Goddard’s Silver Polish Foam | $11.99 on Amazon | Sponge applicator included |
| Wright’s by Weiman Silver Cream | $15.98 on Amazon | Bundled with a polishing cloth, with the sponge inside the jar |
What Else You’ll Need
Soft cloths, and more than one. You’ll want soft cloths: one to apply the polish and a separate clean one for buffing. See the next section for what works and what to avoid.
Latex or Vinyl Gloves. This one is a must for me. You want to protect your hands from harsh chemicals, and the silver polish, regardless of type, can make a mess.
Something to protect your workspace. It’s important to set your silver on something while you polish it. I used a baking sheet lined with paper towels, because I didn’t want to risk getting polish on my counter. The rim of the baking sheet catches drips from a runny polish, and you can carry the whole thing to the sink when it’s time to rinse.
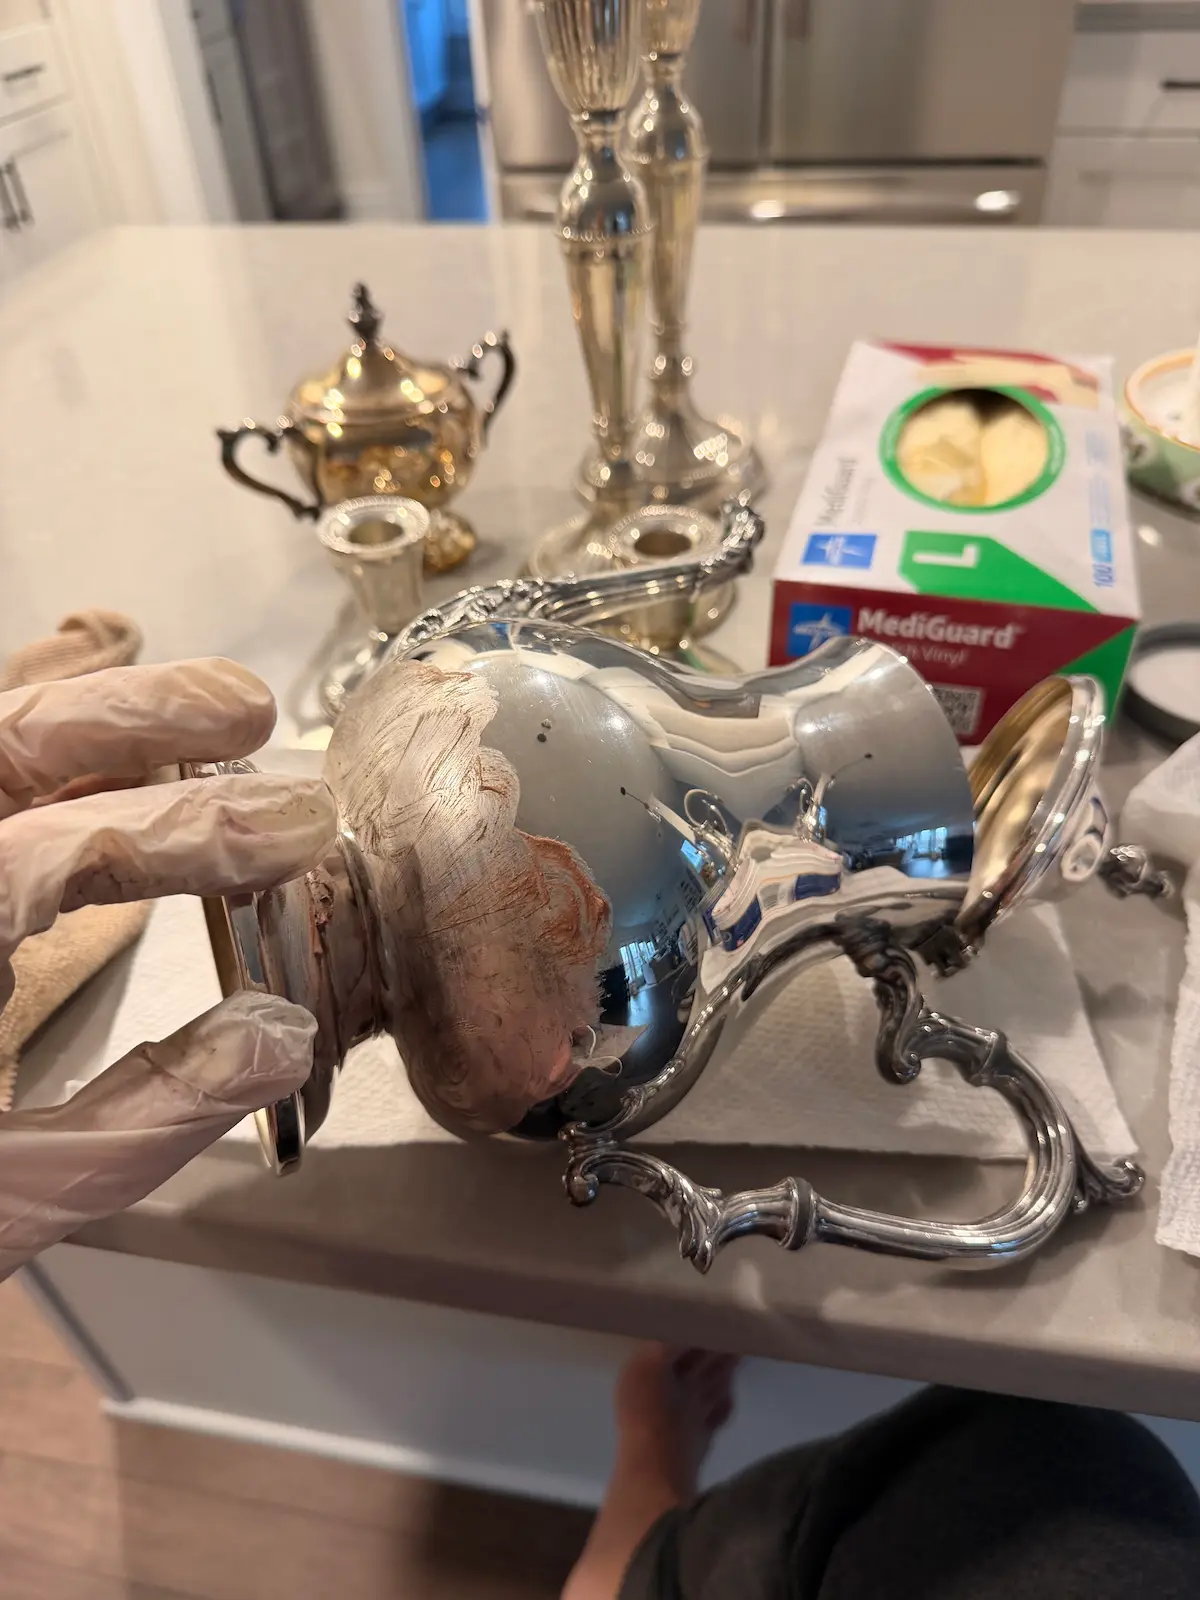 When polishing my silver, I used MediGuard gloves.
What Cloth Should You Use to Polish Silver?
The best cloths for polishing silver are soft microfiber or 100% cotton. The right cloth matters almost as much as the right polish. A rough or dirty cloth can leave fine scratches that dull the shine you worked so hard for.
Cloths that work well:
- Microfiber. This is what I used, and it worked great for both applying polish and buffing. It’s soft, grabs residue well, and doesn’t leave lint behind. I purchased microfiber cloths from QVC. While I wasn't sure if they were the best option for silver, I use them to dust, and they've never scratched a thing.
- 100% cotton. Soft cotton, like an old T-shirt, flannel, or cotton flour-sack towels, is another good choice.
- Silver polishing cloths. These are made specifically for silver and come pre-treated with cleaning and anti-tarnish agents. They’re handy for quick touch-ups and light tarnish. Don’t wash them, though, or you’ll rinse out the treatment.
If you’re using a separate polish, cream, or foam like I did, plain microfiber or 100% cotton is all you need. Save the treated polishing cloths for in-between maintenance.
Cloths to avoid:
- Paper towels and tissues. They’re more abrasive than they feel and can leave scratches and lint. (They’re great for lining your work tray, just not for polishing.)
- Scouring pads, steel wool, or the scrubby side of a sponge. These will scratch silver and can strip right through plating.
- Rough or stiff fabrics. If it doesn’t feel soft against your skin, it’s too rough for silver.
- Dirty cloths. Trapped grit acts like sandpaper. Start with clean cloths, and switch to a fresh section as the cloth turns black.
One more tip: Wash your microfiber and cotton cloths without fabric softener. Softener leaves a residue that can streak your silver and makes microfiber less effective. It’s also a good idea to keep a few cloths just for silver, so they don’t pick up grease or grit from other cleaning jobs.
How to Clean Tarnished Silver, Step by Step
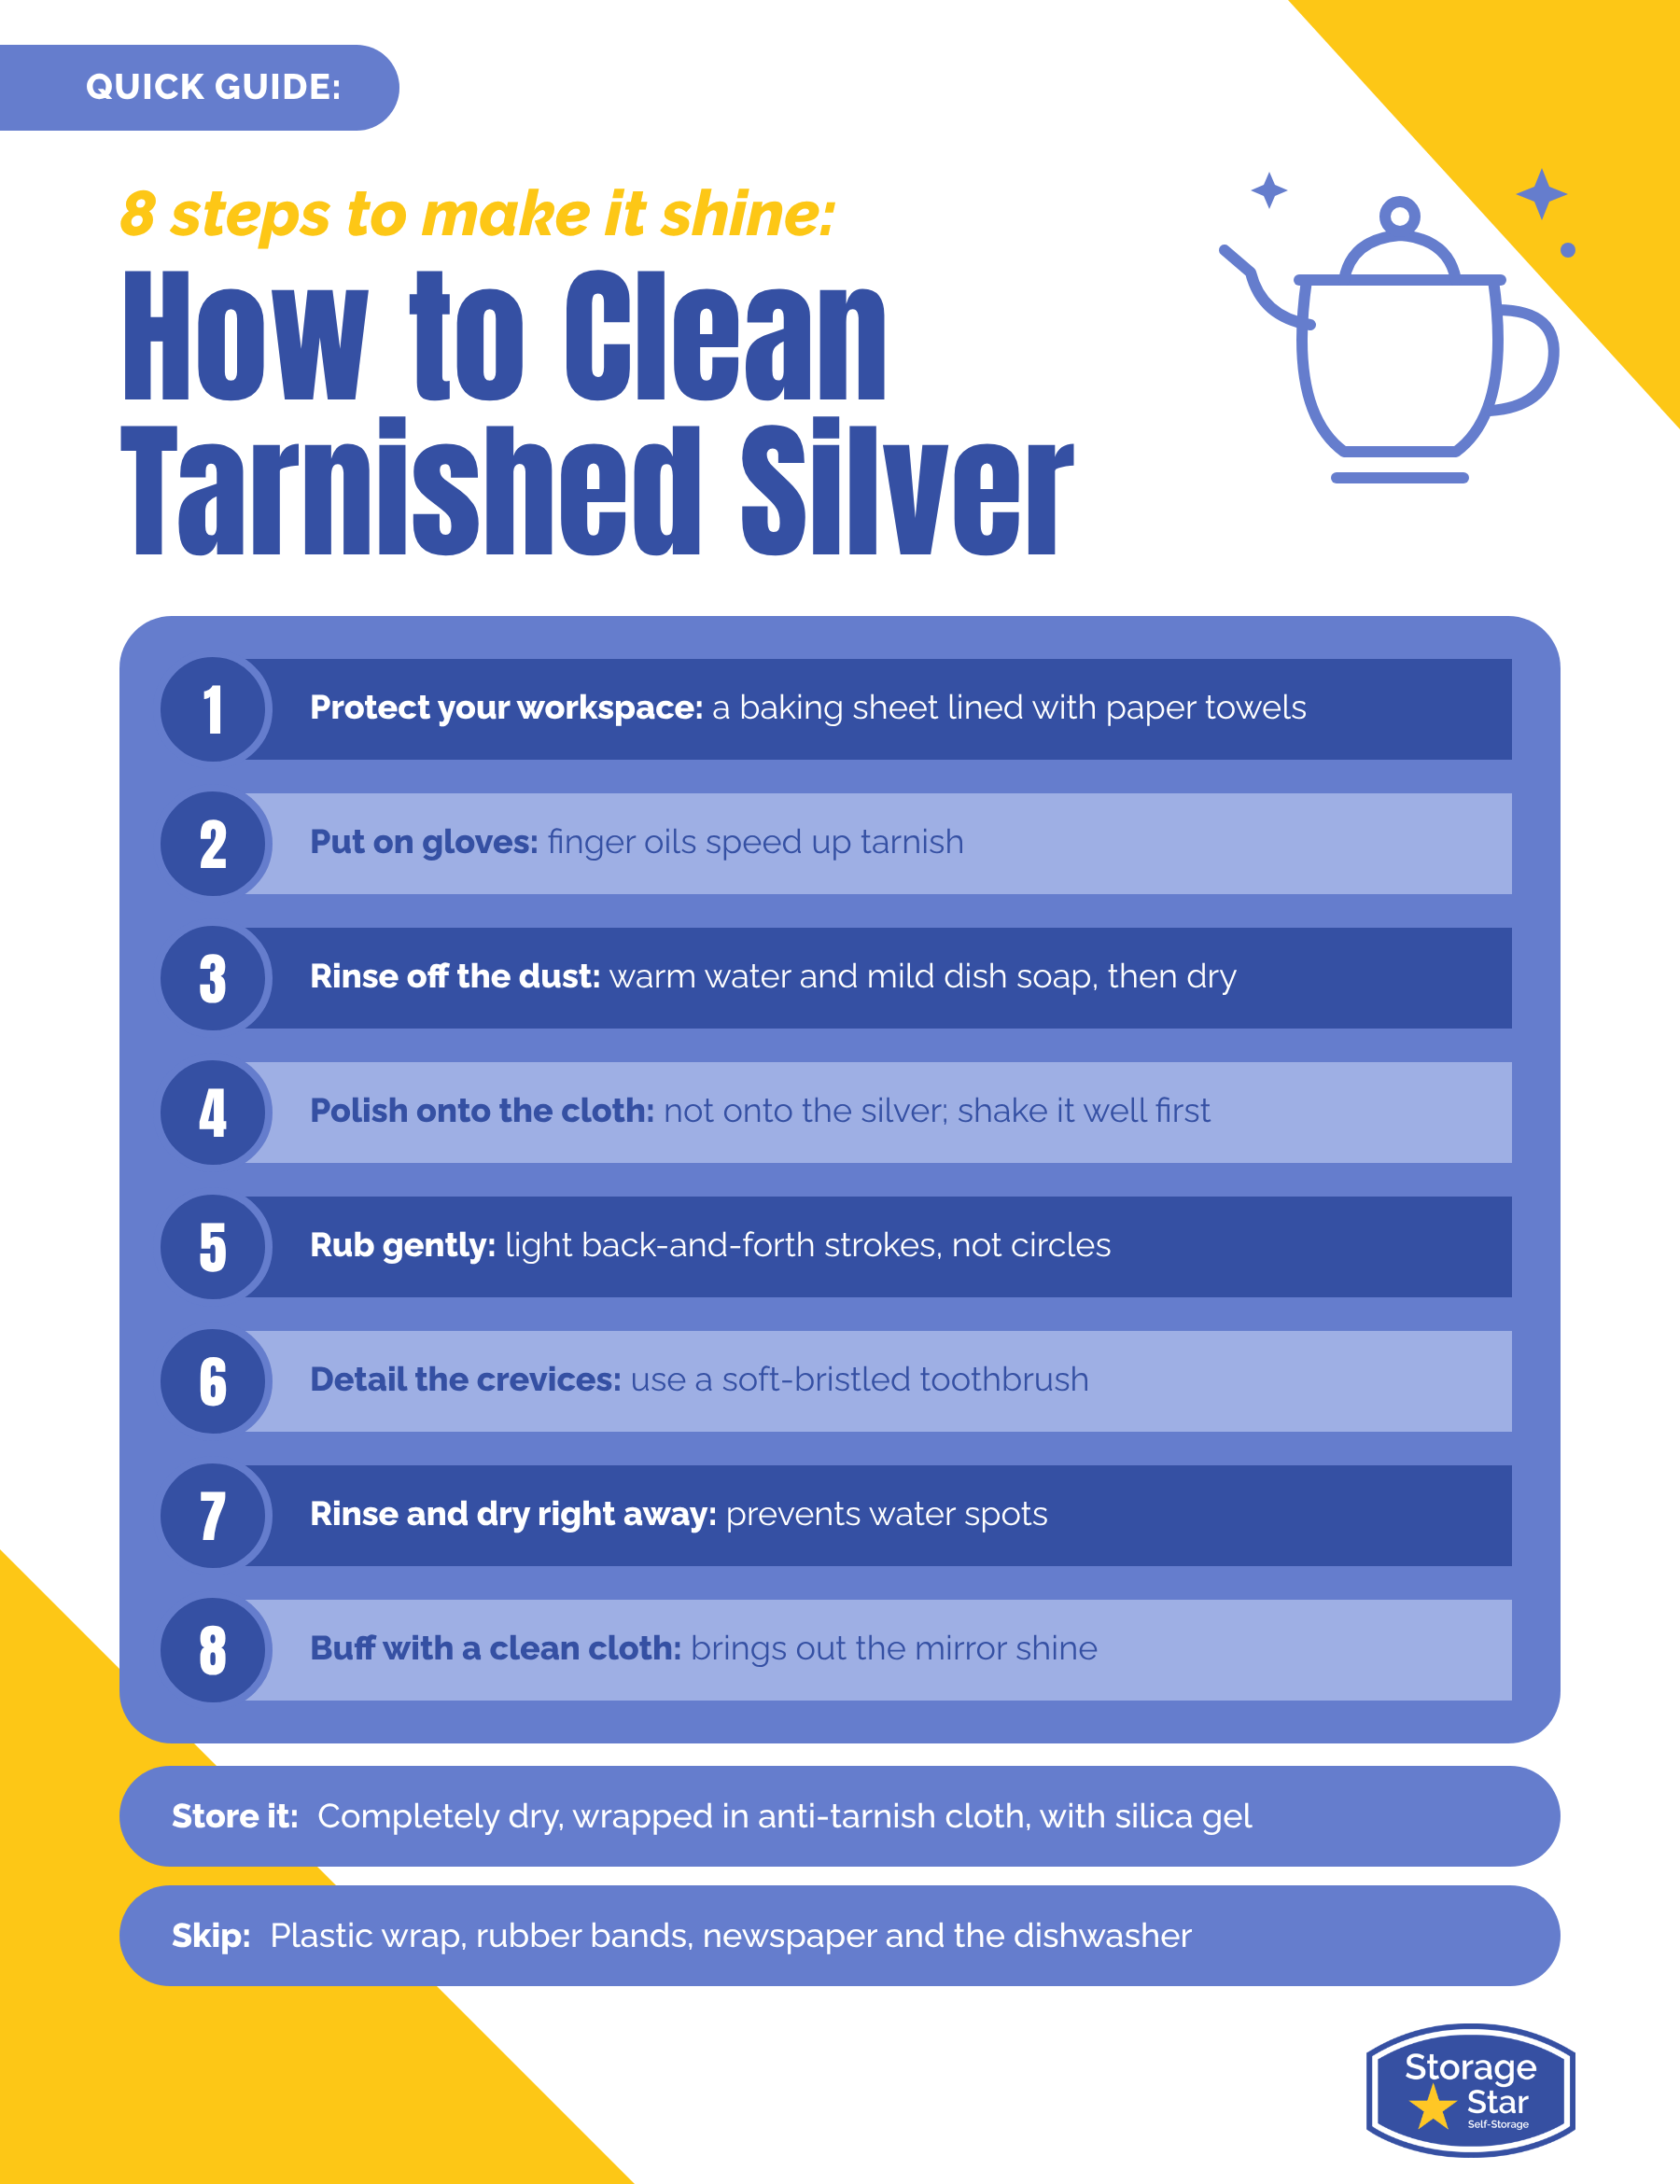
Here’s how to clean tarnished silver at home in eight steps. They work for sterling silver, silver plate, and antique silver; just go more gently with plated and antique pieces.
- Protect your workspace. Set your silver on a baking sheet lined with paper towels, or on an old towel. Polish can drip, splatter, and stain, so keep it off your counters.
- Put on your gloves. The oils on your fingers speed up tarnish and leave smudgy prints on freshly polished silver. Gloves also keep the polish (and that smell) off your hands.
- Rinse off the dust. Silver that’s been in storage for years is usually dusty. Wash it gently in warm water with a little mild dish soap, then dry it. This keeps grit from scratching the surface while you polish.
- Shake the polish well. Then pour a small amount onto your cloth, not directly onto the silver. With a runny polish like Weiman, this is the easiest way to keep it from splashing and clumping. Using a foam polish with a sponge, like Goddard’s? Dampen the sponge with warm water instead and work up a lather.
- Rub gently. Work the polish into the silver with light, back-and-forth strokes rather than circles. Flip to a clean section of the cloth as it turns black. That’s the tarnish coming off.
- Take your time on details. For engraving and crevices, work in small amounts. A soft-bristled toothbrush can help reach tight spots.
- Rinse and dry. Rinse the polish off with warm water, then dry the piece right away to prevent water spots.
- Buff with a second clean cloth. This is the step people skip, and it makes all the difference. With the Goddard’s foam and the Wright’s cream especially, I found I had to buff thoroughly. Buffing with a fresh, dry cloth removes any leftover residue and brings out that bright, mirror-like shine.
A few extra tips from experience:
- Start with less polish than you think. You can always add more, but too much causes clumping. This happened to me when I first began.
- Don’t put silver in the dishwasher. The heat and detergent can dull or discolor it.
- Be gentle with plated pieces. Polish only as much as you need to, so you don’t wear through the plating.
How to Clean Silver Without Polish: The Baking Soda Method
You can clean silver without polish using baking soda, aluminum foil, and hot water. Instead of scrubbing the tarnish off, a chemical reaction between the silver, the foil, and the baking soda pulls the tarnish away from the silver. I stuck with polish for my pieces and haven’t tested this method myself, but it’s a popular option worth knowing about, especially if you have a lot of flatware to get through.
What you’ll need: a heat-safe glass dish, pot, or plugged sink; aluminum foil; baking soda; just-boiled water; tongs; and a soft microfiber or cotton cloth.
- Line your container with foil, shiny side up.
- Lay your silver on the foil. Every piece needs to touch the foil for the reaction to work, so don’t stack or crowd them.
- Add baking soda. A common ratio is about 1 tablespoon of baking soda per cup of water. Some versions add an equal amount of salt.
- Pour in just-boiled water until the silver is fully covered.
- Let it sit for a few minutes. You may notice a sulfur smell as the tarnish lifts. Heavily tarnished pieces may need longer or a second round with fresh foil.
- Remove, rinse, and dry. Use tongs (the water is hot), rinse each piece, dry it right away, and buff with a clean cloth.
When to skip it: Don’t use this method on valuable antique silver, pieces with a dark patina in the details you want to keep, or anything with glued, wooden, bone, or hollow parts, like many teapot handles and weighted candlesticks. Large pieces can also be hard to submerge. For those, a commercial silver polish is the safer bet.
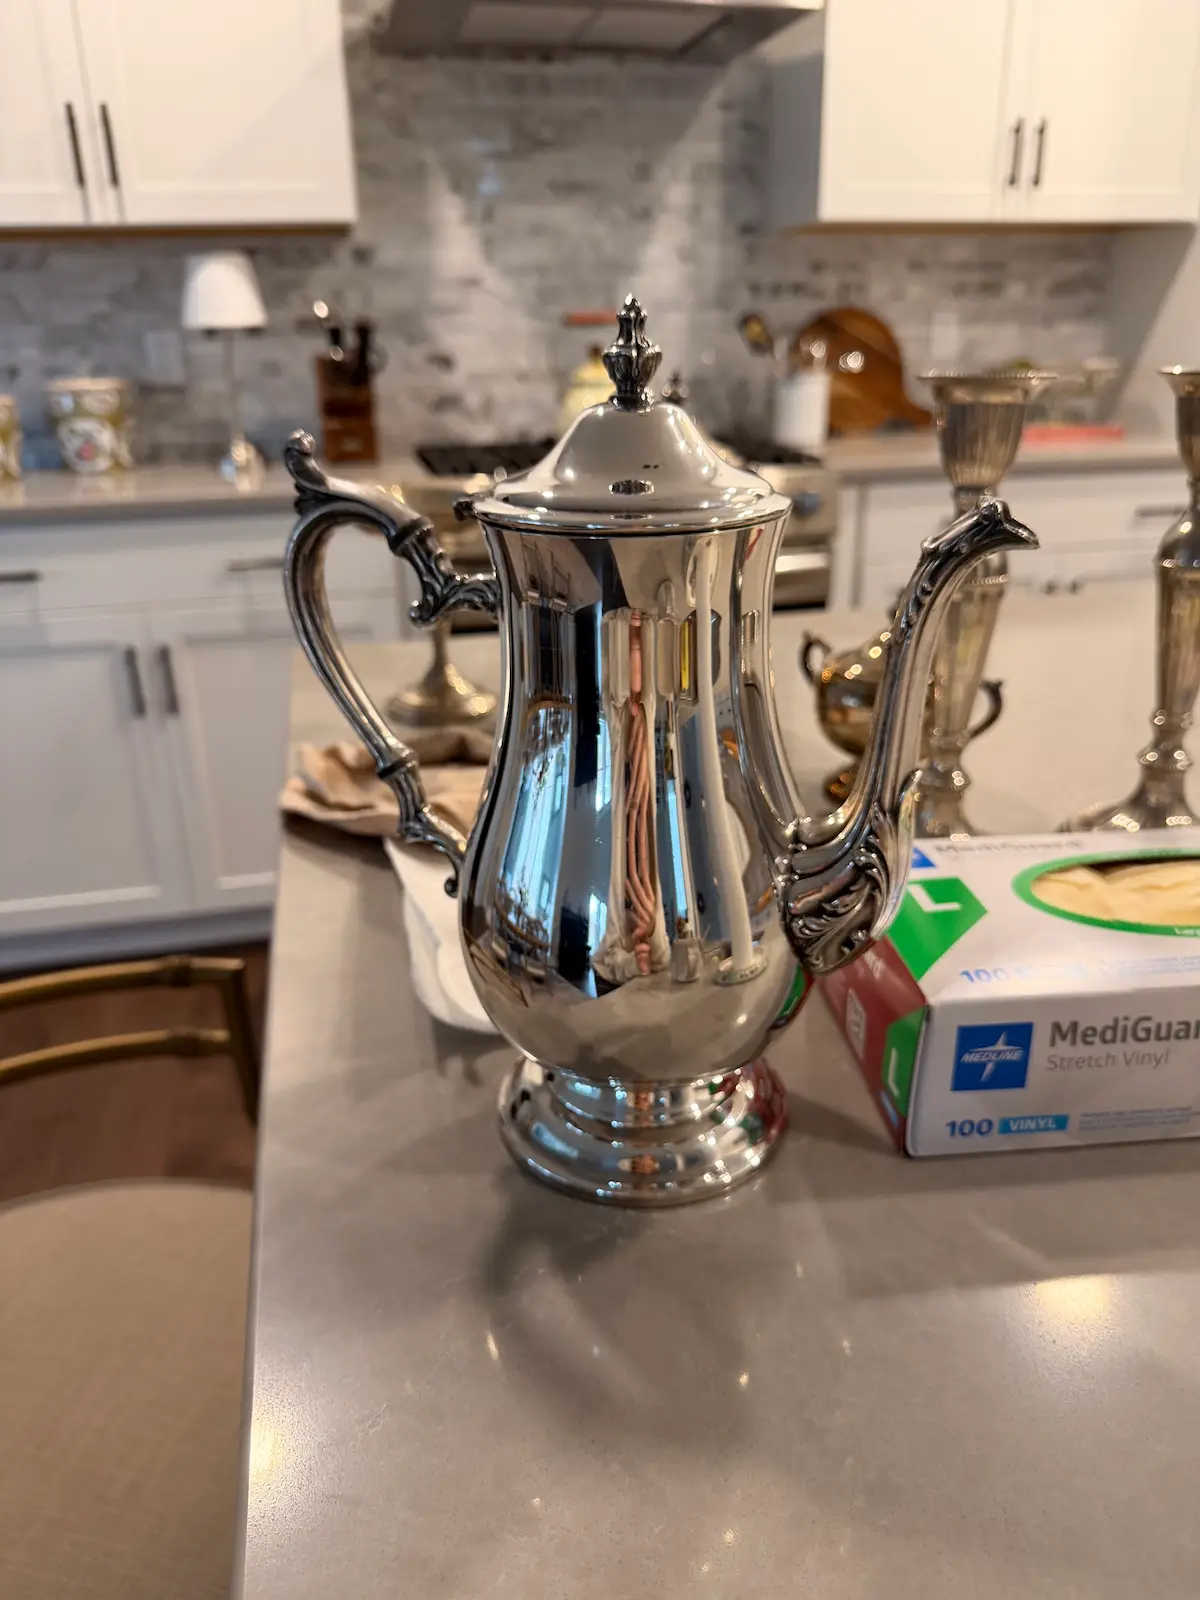 A clean, polished piece
How to Store Silver So It Doesn’t Tarnish
The best way to store silver is clean, completely dry, and wrapped in anti-tarnish cloth or acid-free tissue. Tarnish comes from silver reacting with sulfur in the air, and moisture speeds it up. The goal of good storage is to limit both air and humidity.
- Make sure it’s completely dry. Never pack silver away while it’s even slightly damp.
- Wrap it up. Anti-tarnish cloth bags or silver storage rolls are the gold standard. Acid-free tissue paper is a good budget option.
- Skip the plastic wrap, rubber bands, and newspaper. Plastic traps moisture, rubber contains sulfur that tarnishes silver quickly, and newsprint ink can transfer onto it.
- Keep pieces separated. Wrap items individually so they don’t scratch or dent each other.
- Add a moisture absorber. A few silica gel packets or anti-tarnish strips in the box help keep humidity down.
- Choose the right spot. Temperature swings and humidity are silver’s enemies. If your silver is going into a storage unit, a climate-controlled unit is your best bet. Store it off the floor, in a sturdy, sealed box, away from anything with rubber or wool.
Bring Your Silver Back to Life
Whether it turned up in the back of a storage unit or on an antique-shop shelf, tarnished silver is usually just waiting for a little care. Grab your gloves, a good silver polish, and two clean microfiber or cotton cloths, and you might be surprised by what’s hiding under all that gray. Then store it right, and it’ll stay ready for the next holiday table or the next generation.
FAQs
Does sterling silver tarnish?
Yes. Sterling silver is 92.5% silver mixed with other metals, usually copper, and it reacts with sulfur in the air. That’s why even a solid sterling tea set will darken in storage.
Does silver-plated silver tarnish?
Yes. Silver plate tarnishes just like sterling, because its surface is real silver. The difference is in the cleaning: the plating is thin, so polish gently and only as much as you need.
Why does silver tarnish?
Silver tarnishes when it reacts with sulfur compounds in the air and forms a thin layer of silver sulfide. Humidity speeds it up, and so do rubber, wool, and foods like eggs and onions.
Can you clean silver with baking soda and aluminum foil?
Yes, for light tarnish on everyday pieces. See the baking soda method on our blog post for step-by-step instructions and which pieces to skip.
How often should you polish silver?
Only when it looks tarnished. Silver you use and wash regularly needs polishing less often. Stored silver usually needs a polish once or twice a year, and right before the holidays is a natural time. Polishing too often can wear down silver plate.
How much does silver polish cost?
Most silver polish costs about $10 to $16 for a jar or bottle.
Prices vary by retailer and size, and they often drop during sales. The baking soda method costs even less, since you probably already have the supplies in your kitchen.
Does silver polish expire?
Yes, it can. A common rule of thumb is that most metal polishes should be replaced after about two years. An old bottle may not just work less well; some sources warn that silver polish used past its shelf life can even cause damage.
This is worth knowing if you’re cleaning out a storage unit, because the polish might be sitting in there right next to the silver.
Signs your polish is past its prime:
- It has separated and won’t mix back together, even after a good shake.
- It’s clumpy, gritty, or has dried out around the cap.
- The color or smell has changed noticeably from when it was new.
- It takes far more rubbing than it used to.
How can I make my silver polish last?
Close the cap tightly after every use, and store it somewhere cool and dry, away from extreme heat or cold. If you’re not sure about an old bottle, test it on a hidden spot first, or just buy a fresh one. Polish is inexpensive compared to the silver it’s protecting.